
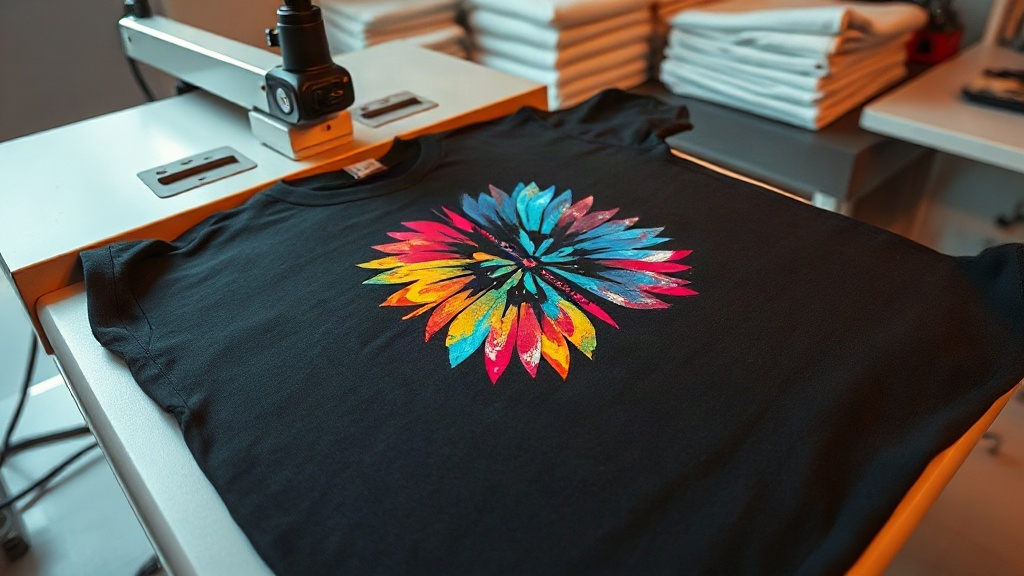
When you first hear about DTF transfers, you might wonder if they're just another passing trend in the world of custom apparel. But once you see the results—vivid colors, soft feel, and incredible durability—you'll understand why so many creators are switching to this method. Unlike traditional heat transfer vinyl or screen printing, DTF transfers offer a unique combination of flexibility and simplicity that appeals to both beginners and seasoned professionals. In this guide, I'll walk you through everything you need to know to get started, from the basic science behind the process to practical tips that save you time and money. Whether you're running a small print-on-demand shop or just want to personalize gifts, mastering DTF transfers can open up a world of creative possibilities.
What Are DTF Transfers and How Do They Work?
DTF stands for Direct to Film. It's a printing method where your design is printed onto a special film, sprinkled with a hot-melt adhesive powder, and then cured. The result is a transfer that can be heat-pressed onto fabrics. The magic lies in the adhesive powder: it melts and bonds the ink to the fabric, creating a strong, stretchable bond that holds up wash after wash. The process involves a few key steps:
- Design Preparation: Your artwork is printed onto a PET film using specialized DTF inks (usually CMYK plus white).
- Powder Application: While the ink is still wet, a thermoplastic powder is applied evenly over the print.
- Curing: The film goes through a heat source (like a heat press or oven) to melt the powder, creating a sticky adhesive layer.
- Transfer: The film is placed on the fabric and pressed with heat and pressure. The adhesive bonds with the fibers, and after cooling, the film is peeled away, leaving the design behind.
What sets DTF apart is that it doesn't require pre-treatment of the fabric, and it works on a wide range of materials, including cotton, polyester, blends, and even leather. That versatility makes it a favorite for print-on-demand businesses that need to offer diverse products without stocking multiple transfer types.
Why Choose DTF Transfers Over Other Methods?
If you're familiar with heat transfer vinyl (HTV) or screen printing, you might be wondering what makes DTF worth the switch. Here are the standout benefits:
- No Weeding Required: With HTV, you spend hours cutting and weeding tiny details. DTF eliminates that tedious step entirely—just print, powder, cure, and press.
- Unmatched Color Vibrancy: DTF inks produce bright, opaque colors even on dark garments, thanks to the white ink base. You get photo-quality prints without sacrificing detail.
- Works on Almost Any Fabric: Cotton, polyester, nylon, canvas, denim—DTF adheres to them all. This flexibility means you can offer a wider range of products without changing your process.
- Soft Hand Feel: Unlike some plastisol transfers that feel rubbery, DTF prints have a soft, flexible finish that moves with the fabric.
- Durability: When applied correctly, DTF transfers withstand dozens of washes without cracking, peeling, or fading.
- Cost-Effective for Small Runs: Screen printing requires setup costs per color, making short runs expensive. DTF has no minimums; you can print one-off designs economically.
For print-on-demand sellers, these advantages translate to faster fulfillment, lower inventory risk, and happier customers. I've seen firsthand how DTF can turn a simple t-shirt into a premium-looking product that customers rave about.
Step-by-Step Guide to Applying DTF Transfers
Getting a perfect DTF transfer isn't rocket science, but attention to detail makes all the difference. Follow these steps for professional results every time.
1. Prepare Your Workspace and Materials
You'll need a heat press (or a home iron with careful technique), your DTF transfer, the garment, and a protective sheet (like parchment paper or Teflon). Ensure your workspace is clean and free of dust—particles can ruin the adhesive.
2. Pre-Press the Garment
Pre-pressing removes moisture and wrinkles, which helps the transfer adhere evenly. Set your heat press to around 300°F (150°C) and press the garment for 5-10 seconds. Let it cool slightly before proceeding.
3. Position and Press
Place the DTF transfer on the garment with the printed side facing up (the adhesive side down). Cover it with a protective sheet. Press with medium-heavy pressure for 15-20 seconds at 300-320°F (150-160°C). The exact time and temperature can vary by film brand, so always check the manufacturer's recommendations.
4. Peel and Finish
After pressing, allow the transfer to cool completely before peeling off the film. This "cold peel" method ensures the adhesive fully sets. If you peel while hot, the design might stretch or lift. Once peeled, you can do a final press for 5 seconds with a protective sheet for extra durability.
Pro tip: If you're using a home iron, avoid steam and apply firm pressure, moving slowly across the design. It's doable, but a heat press gives more consistent results.
Common Mistakes to Avoid with DTF Transfers
Even seasoned crafters run into issues. Here are the most common pitfalls and how to sidestep them:
- Insufficient Pressure: Without enough pressure, the adhesive won't penetrate the fabric fibers, leading to peeling. Make sure your press is calibrated.
- Wrong Temperature: Too low, and the adhesive won't melt; too high, and you risk scorching the fabric or film. Invest in an infrared thermometer to verify.
- Peeling Too Soon: Patience is key. Let the transfer cool completely before peeling.
- Ignoring Fabric Type: While DTF works on many fabrics, some delicate materials (like silk or certain nylons) may require lower temperatures. Always test on a scrap first.
- Poor Storage: Store unused transfers in a cool, dry place away from direct sunlight. Humidity can activate the adhesive prematurely.
By avoiding these mistakes, you'll achieve consistent, professional-looking results that keep customers coming back.
DTF Transfers in Print-on-Demand: A Game Changer
For print-on-demand businesses, DTF transfers offer a level of flexibility that's hard to beat. You can print designs on demand, without holding inventory of blank garments or pre-made transfers. This reduces waste and allows you to offer a huge variety of products—from t-shirts and hoodies to tote bags and pillowcases. Plus, the ability to produce one-off items means you can cater to niche audiences or run limited editions without financial risk.
Another advantage is the quality. Customers expect vibrant, long-lasting prints, and DTF delivers. I've seen shops increase their average order value simply by switching to DTF because the prints look more premium. And since DTF works on both light and dark fabrics, you can expand your color options without worrying about ink opacity.
If you're using a fulfillment service, many now offer DTF as an option. But even if you're doing it in-house, the learning curve is short, and the equipment costs are reasonable compared to other methods.
Frequently Asked Questions About DTF Transfers
How long do DTF transfers last?
When applied correctly and cared for properly, DTF transfers can last as long as the garment itself. Expect 50+ washes without significant fading or cracking. To maximize longevity, wash inside out in cold water and avoid harsh detergents or high heat in the dryer.
Can I use DTF transfers on 100% polyester?
Absolutely. DTF transfers adhere well to polyester and polyester blends. However, because polyester is heat-sensitive, you should use a lower temperature (around 280-300°F) and shorter press time to avoid scorching or dye migration. Always test on a sample first.
Do I need a special printer for DTF?
Yes, DTF requires a printer that uses DTF inks and can handle PET film. Many converted Epson printers are popular for this. Alternatively, you can outsource your printing to a DTF service and just do the application yourself, which lowers the entry barrier.
What's the difference between DTF and DTG?
DTG (Direct to Garment) prints directly onto the fabric, while DTF prints onto a film first and then transfers. DTF generally works on more fabric types and doesn't require pre-treatment, but DTG can be more cost-effective for 100% cotton in large runs. Your choice depends on your product mix and volume.
How should I store unused DTF transfers?
Keep them in a cool, dry place, ideally in a sealed bag or container. Avoid exposure to moisture and direct sunlight. Properly stored transfers can last for several months without losing their adhesive properties.